How to Apply Concealer (Because Dark Circles Suck)
While you might not be able to get enough sleep to help make your skin looks its best, we can all certainly fake it when we apply concealer! And this is way easier than you might think!

Dark circles are the worst! Thanks to my allergies, my under-eye circles can only be described as aggressive.
So the last time my friend and makeup artist, Yara, came over, I had her show me how to apply concealer to the under-eye area.
From time to time, Yara shares her makeup artist expertise with me.
You may remember that I previously posted an easy fall makeup look and a fresh face look for busy moms.
Low Maintenance Tutorials
While I’m girly, I’m pretty low maintenance and definitely don’t feel confident in my makeup skills. So I had Yara show me the right way to apply concealer.
My intent with these makeup tutorials is to help you, the everyday moms, learn a little more about makeup application. Hopefully, they will help you.
Because I really don’t love to be in photos (I HATE my skin). Especially the before pictures.

What You’ll Need to Apply Your Concealer
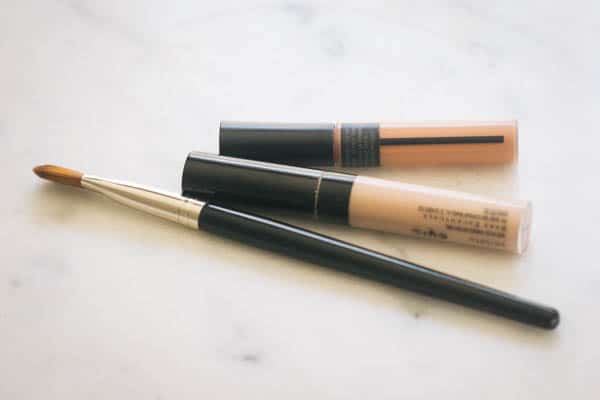
Not only will you apply concealer to hide your dark circles, but you will also use a color corrector. And while you don’t need to use a concealer brush (fingers work just fine!) it does help.
The products Yara used on me are:
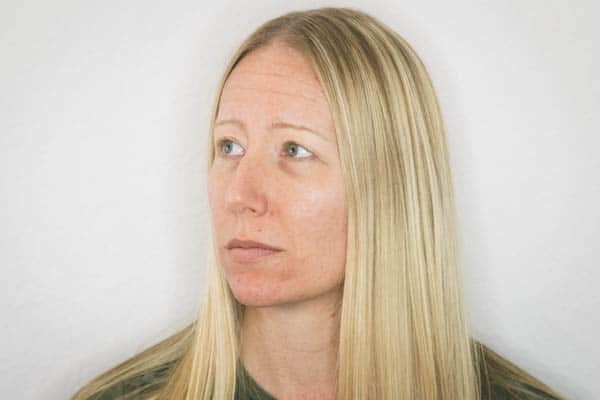
LOOK AT HOW DARK THOSE CIRCLES ARE! I think this is the same before picture I used in another tutorial. I don’t rush to take a ton of before photos. But I wanted you all to see what I’m working with so you know there is no trickery in the photos. Yara knows what she’s talking about!
How to Apply Concealer
From Yara, of Nixey Artistry:
To start, use a really good serum or eye cream for hydration.
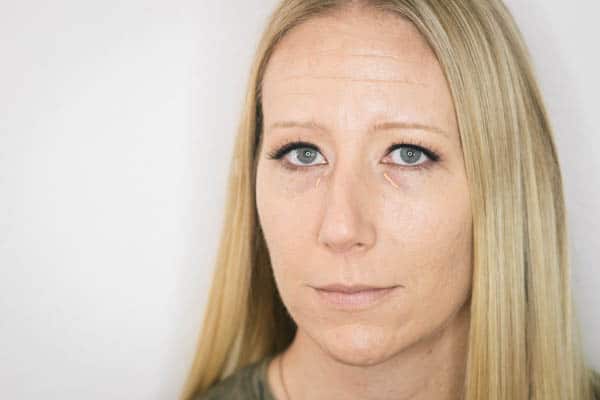
If you have dark circles, you’ll want to also use a good color corrector. Armani and Bobbi Brown have good ones that help cut out darkness, and usually are peach in tone. Just a small amount is all you need!
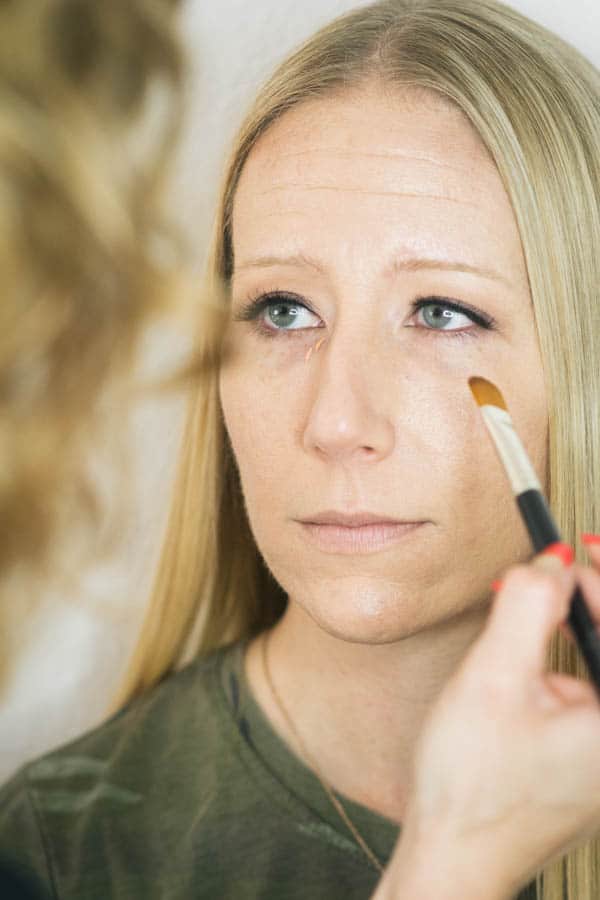
With your finger or a brush, blend out the corrector, making sure to go into the inner corner of the eye.
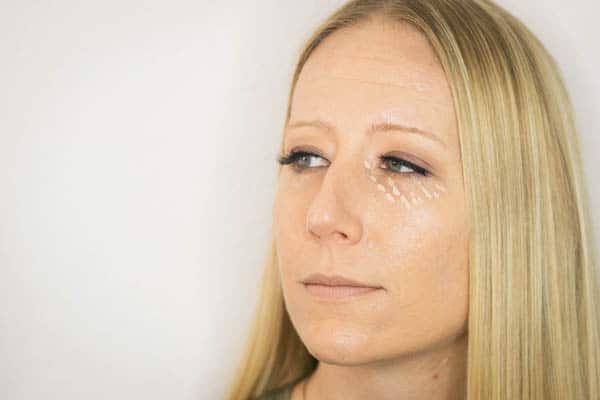
Follow with your favorite concealer. It should be 1/2 lighter than your skin tone to brighten your eyes a bit.
The Maybelline FiT Me line has an array of colors that make it pretty easy to find the perfect one for your skin (and they are around $7!)…apply a few dots like shown in the photo.
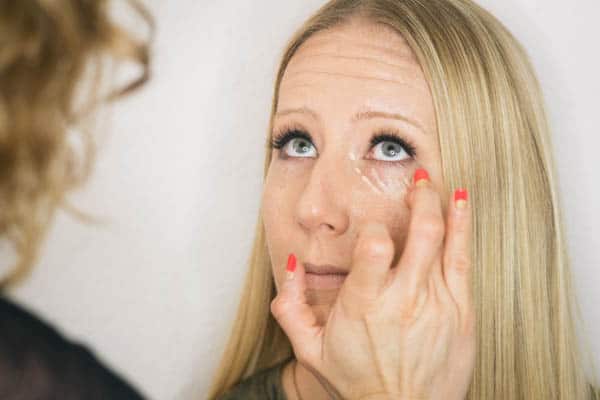
Blend with your finger or brush. If you like, you can set the makeup under the eye area by using Laura’s Mercier Secret Brightening Powder.
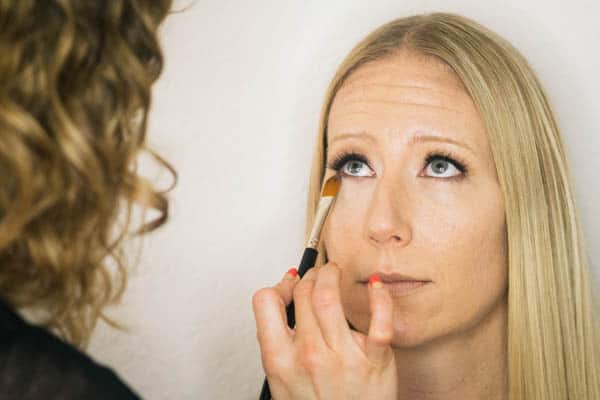
Repeat on the other eye.
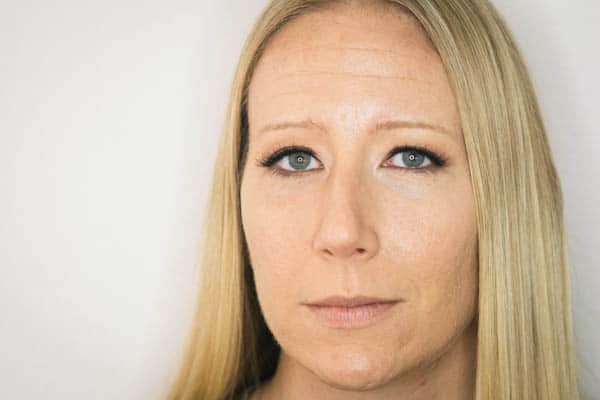
Boom! SO much better than the before, right? When Yara does my makeup, she always starts with the eyes. That way, if there is any excess shadow that falls under the eye, you can clean that up before you put on the concealer.

And, of course, we finish up the loop with Holliegirl Cupcake Kiss!

Learning how to apply concealer isn’t as daunting as it seems! I generally skip the color corrector unless I am really getting myself ready to go somewhere where I want to appear professional or like I didn’t just roll out of bed.
God bless concealer. AmIright?
Shop this post:
Images for this post by Zumbado Photography
Related Posts
My Favorite Summer Beauty Products
ELEMIS Skincare Review and Favorite Anti-Aging Products
This post was originally published on August 22, 2017, and has now been updated for clarity.



I’ve been following your super blog since I found your helpful post on Mohs–which I’m having next week. So…question…is the pic in the white shirt before or after the Mohs? I don’t see any sort of scar. (Please say after and there’s no more scar. :) )
Hi Carol! Thank you so much for reading! You are going to do GREAT next week! However you react to it is the right way. Just remember that. I’m a crier. :) Yes, this is after Mohs. I had Mohs in 2013.There is def still a scar but it is not very noticeable. It’s not raised at all which is awesome. I’m not sure how they will do your stitches but after I had mine out and went back for a check up the doctor told me to gently massage the scar to help continue to break down the scar tissue so it wouldn’t be raised. I think that really helped but don’t do that until you are pretty healed! Also, make sure you put sunscreen on it, especially right after your procedure is done (or stay out of the sun like we are supposed to :) ). Let me know how it goes!! XO Good luck!